Photobucket had recently changed their policy and now all the images from my 650+ blog posts are disabled. I am slowly editing them by moving my images to my own server at AWS, but it will take time. In case there is a particular old post you want to see the images of, kindly drop me a mail at mizohican@gmail.com and I'll keep that at a high priority. Thank you.

Wednesday, June 26, 2019

Chp 764. Dinner by Teresa


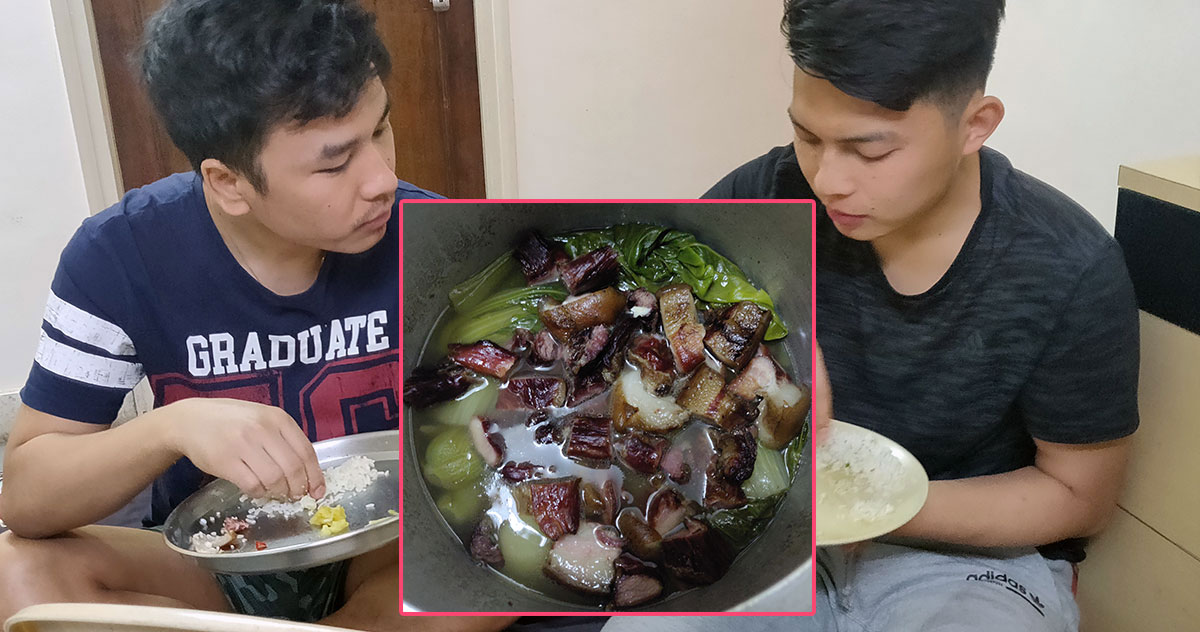
For my next edition of foodie blog update series, here are three very simple Mizo recipes you can try at home too. This time, the chef is my dear friend Teresa.

As I have mentioned in my previous blog post Pune Mizo Mothers Dinner, Teresa likes to cook under immense pressure, so she is a wonderful pressure cooker :P

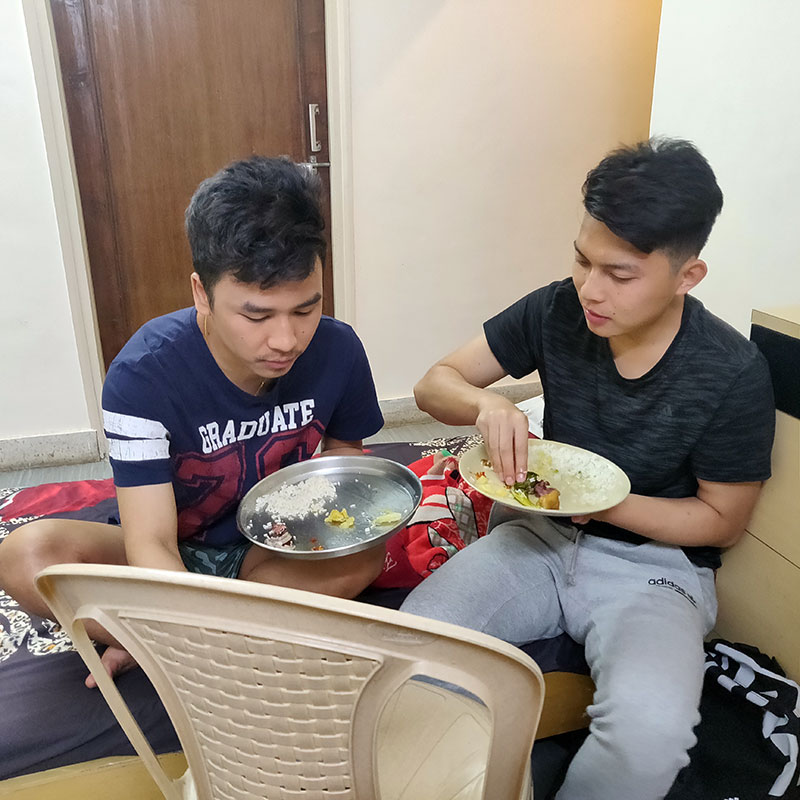
Here is the delicious dinner she invited me to a couple of days ago, along with their recipes mentioned below…


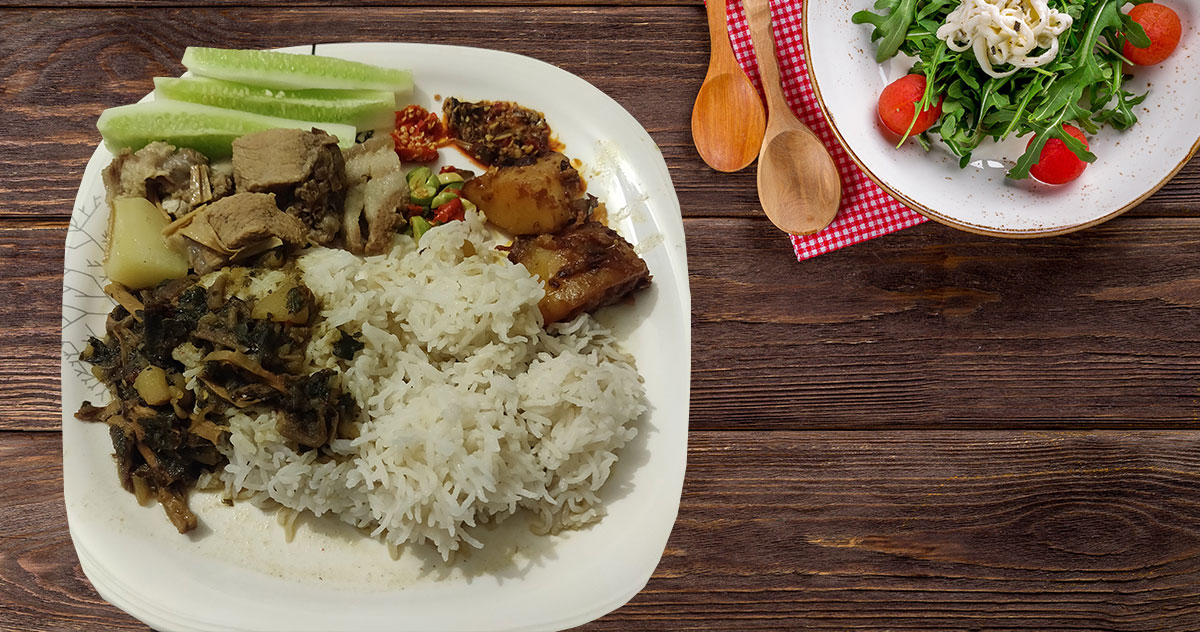
Mouth-watering drool right? Ok without further ado, here are the cuisines along with their recipes.


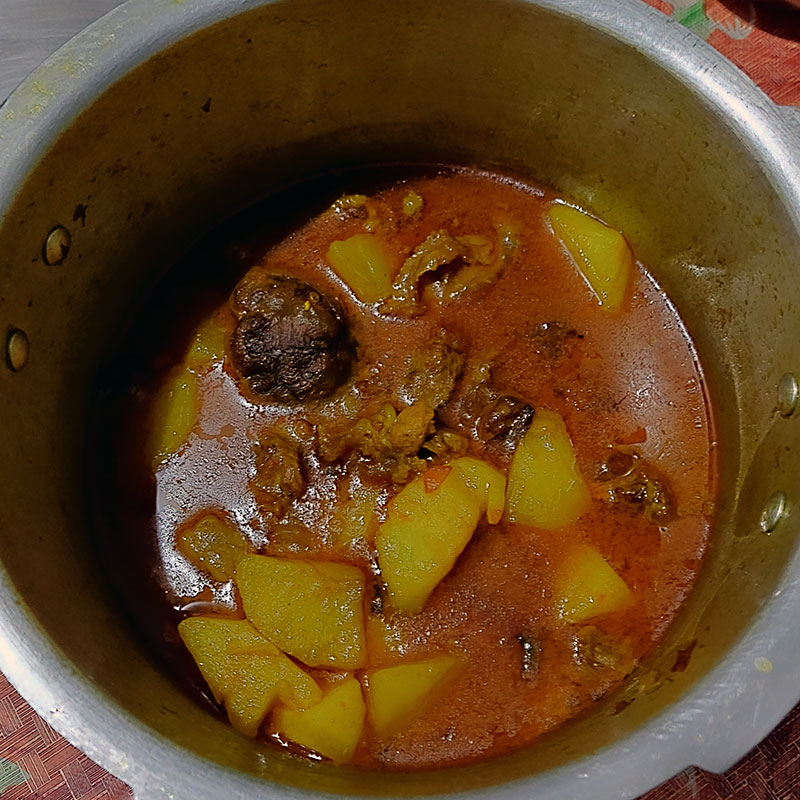
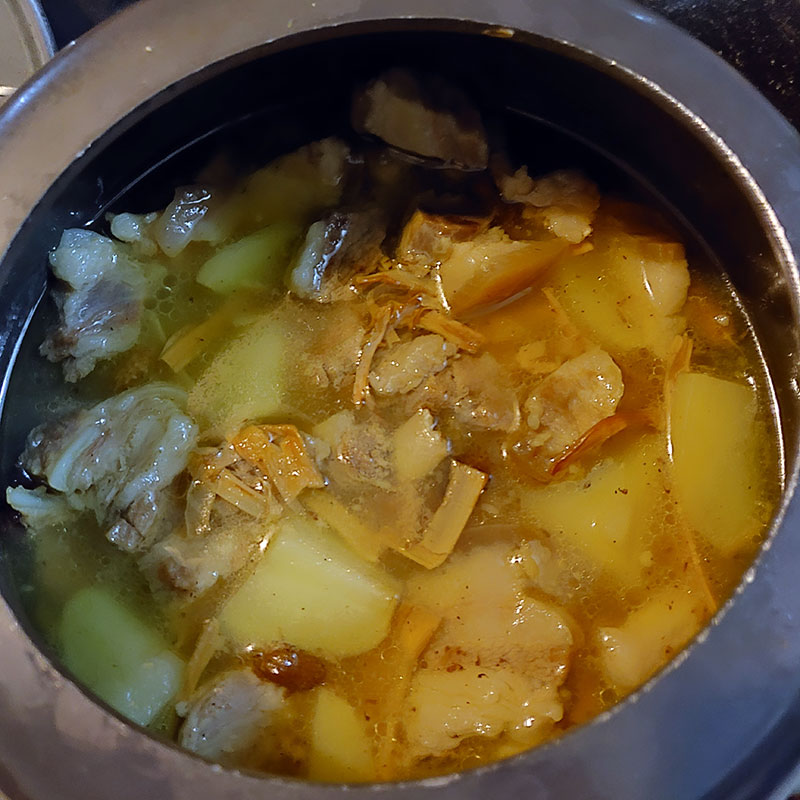
Pork with Rawtuai rep (Sun-dried Bamboo shoot) and Potatoes.

First, buy some fresh farm Pork and wash them nicely.


Put the pork in a pressure cooker with some water and then cook it until the cooker whistles around 6-7 times.

Switch the stove off and wait for the pressure cooker to depressurize.

Meanwhile, chop potatoes into medium pieces. Once the pressure cooker can be opened, throw in the chopped potatoes and along with sun-dried Bamboo shoot, and cook it again.

Wait for the pressure cooker to whistle one more time and your awesome Mizo Pork dish is ready!


Yumm indeed.


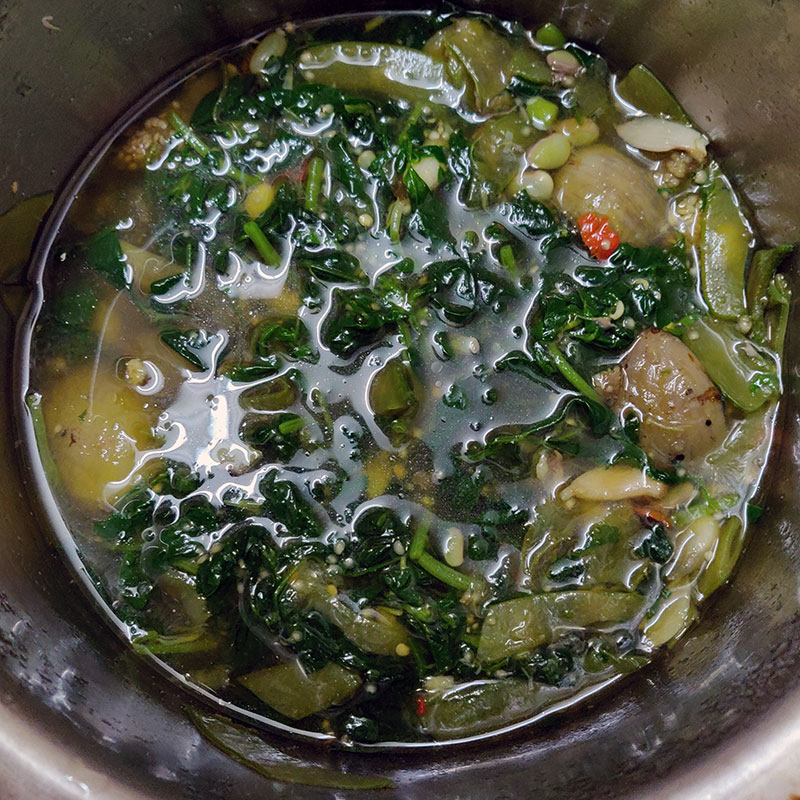
Methi (Fenugreek) Bai.


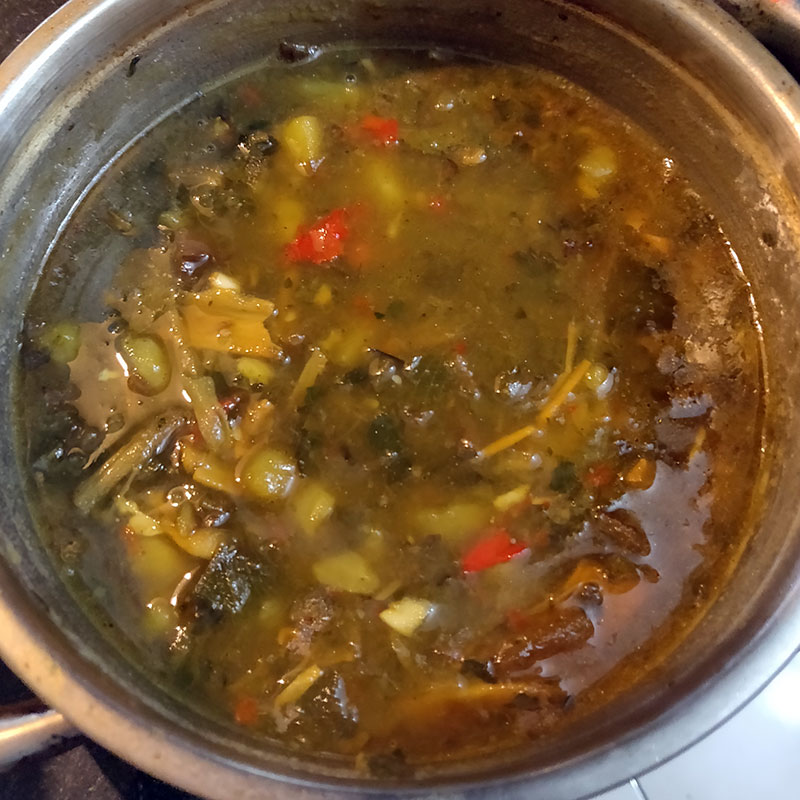
Boil water in a pan and just before it boils, throw in green chillies and a few drops of oil.

Once the water boils, add chopped potatoes in the mixture. The potatoes pieces should be small, and the smaller they are, the faster they boil.

After some time, add methi and sun-dried bamboo shoot into the pan.

Once the potatoes are ready, add garlic and boil for 2-3 more minutes and your awesome Mizo bai is ready!
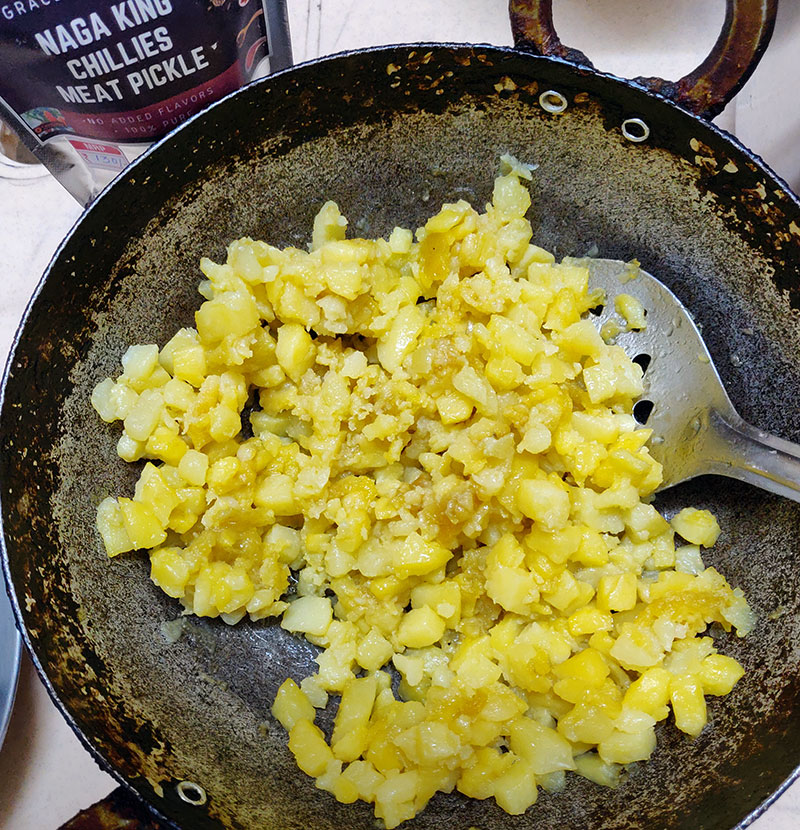

Potato fry.


Chop potatoes into large pieces (cut a medium sized potato into two pieces).

Heat some oil in a frying pan, and once heated, add garlic and onions, followed by turmeric powder and chilli powder. Once they are fried deep enough, add chopped tomatoes along with chillies.

Fry for some more time until it is gravy-ish. Finally add the chopped potatoes.

Heat the pan in simmer only (very important, or else it will be burnt). Occasionally stir until the potatoes are cooked.


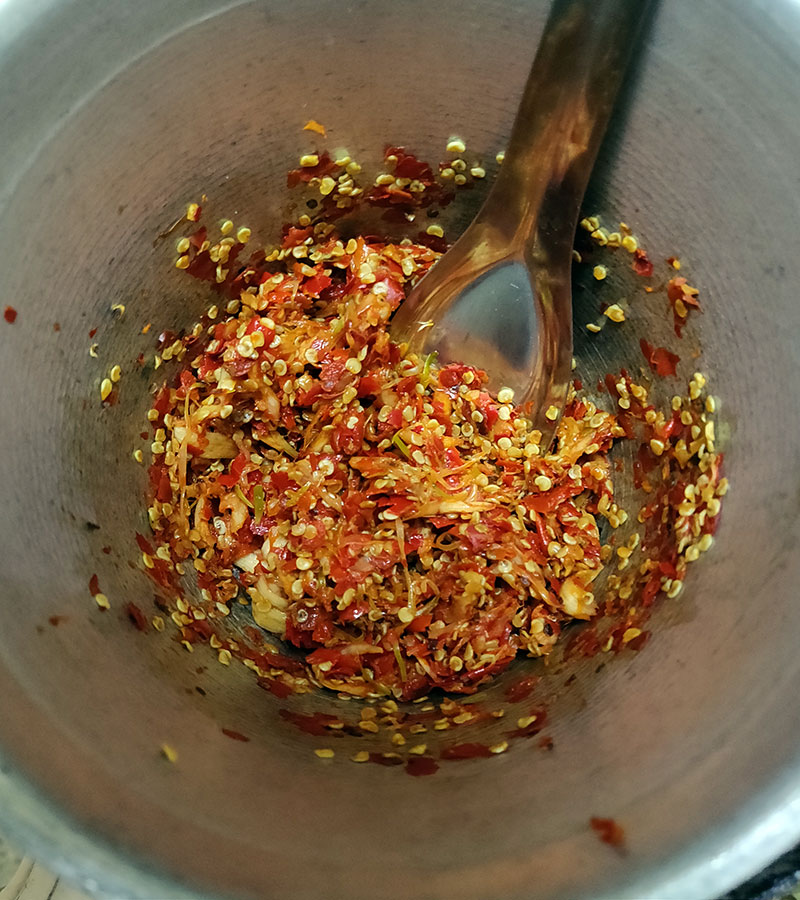
Mizo chillies and Zawngṭah.


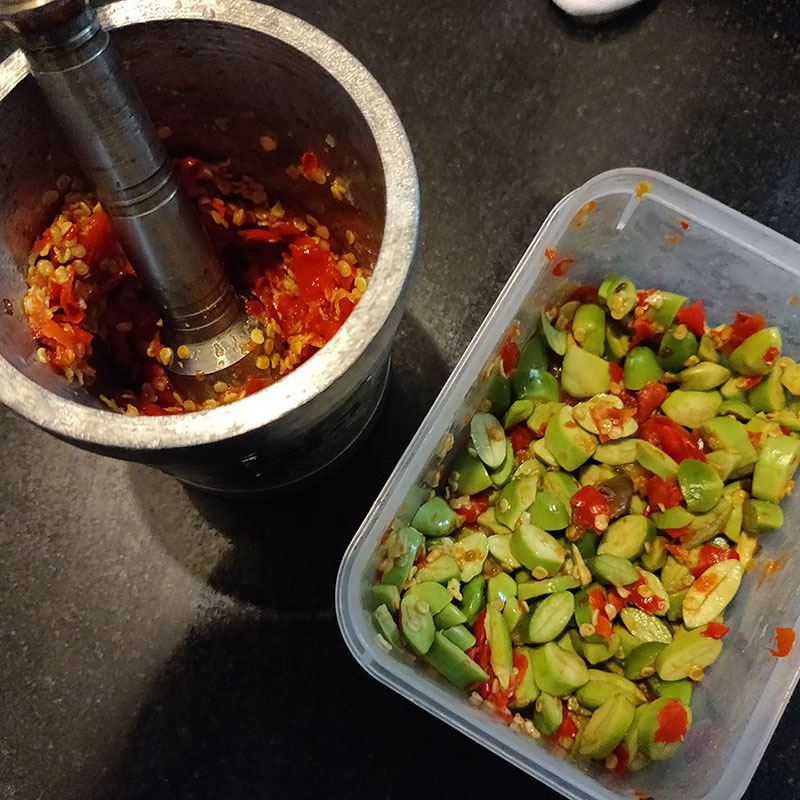
Grind fresh Mizo Chillies (bird's eye chilli) into pulp.

Take the seeds of Zawngṭah (Parkia speciosa / Petai / Stink beans) and peel off the cover.

Slice the seeds into smaller pieces and add ground chillies along with salt. Mix it up.


Plain Cucumber.


Take a cucumber and peel it.

Slice it across horizontally.

Be careful not to cut your fingers.

If you cut your fingers, then they will bleed.

If your fingers bleed, then there will be blood.

The cucumber will then become a bloody cucumber.

Remember, we are making plain cucumber, not bloody cucumber.

:D

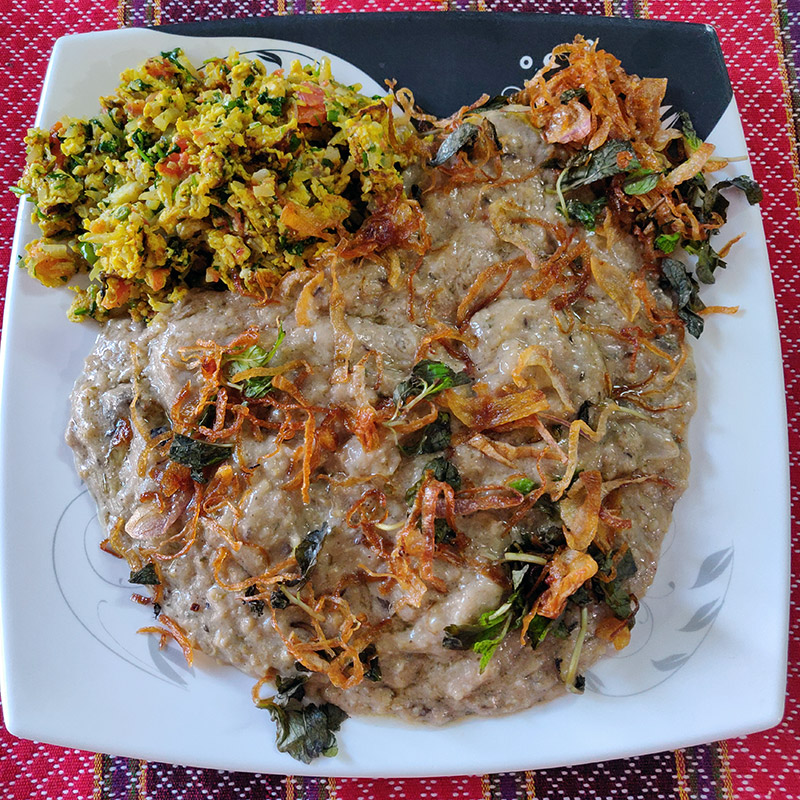
And so that was it. Three easy-to-make recipes courtesy Teresa.


Super yummm. Do let me know if you are going to copy her method of cooking or not.

Until my next post, cheers everyone!


Monday, June 24, 2019

Chp 763. Dinner by Marka


Continuing with my Foodie blog updates, here are some recipes by my friend Marka. He lives in KP not very far from my apartment, and he invited me to his house for dinner one fine night. We had Mizo boiled pork and Mizo bai that night, yummm.


Here are the recipes…


Boiled Mizo Pork


We all have our own method of cooking boiled pork. I will blog about how I cook mine later, Marka's method is a bit different from mine and here is a step by step instruction on how he made his version of Mizo boiled pork.

Ingredients: Raw Pork and Pok Choi.

1. Wash the pork as it is without cutting it into pieces.

2. Pour around 4-5 cups of water inside a pressure cooker.

4. Cook the pork in the pressure cooker for 15-20 minutes (let it whistle around 2-3 times).

3. Wait for the cooker to cool down and take the pork out.

4. Chop the cooked pork into medium pieces.

5. Using the same water, boil pok choi.

6. After around 10 minutes, add the chopped pork pieces in the cooker again and then cook for 5 minutes until it whistles twice. Done.

And yes, Marka's version of Mizo boiled pork was really good!


Mizo Bai


This one is very simple and easy to make, and yet no Mizo cuisine is complete without it.

1. Take all the ingredients like Brinjals, Bepui (Lablab bean / Hyacinth bean) and beans, and cut them into small pieces.

2. Boil all of them in water along with some chillies.

3. Just before it is boiled, add chopped Methi (Fenugreek) into the mixture along with a pinch of soda.

4. The Bai is ready :)

Simple yet sooo good!


Fried Potatoes and ground chillies


I don't think I really need to explain how to make the above two dishes :D As Abraham Lincoln once said, "If you don't know how to make fried potatoes or grind Mizo chillies, then you really don't deserve to eat".

Here's my plate that night!


As you can see from my plate above, the fat pieces are the best part of a Mizo boiled pork cuisine. Like I have mentioned earlier, there are many methods of making it, but the fatty part is a compulsory ingredient. And that is a problem I have seen at many restaurants outside Mizoram like Mumbai and Pune where you hardly get any fat, it's all just mostly meat meat meat sans the fat. Sad.

Everybody else enjoyed the dinner that night.


Tuli's sister who was visiting from out of town, who is a xerox copy of her, not just in looks but the same irritating trait as well :D


And so that was it. Great dinner by Marka, thanks once again, and hope you find his cooking method useful. See you all in my next foodie blog update everyone. Cheers.


Wednesday, June 19, 2019

Chp 762. Dinner by Christina


Continuing with my Foodie blog updates, here is a simple home-made Chicken Biryani that you can also cook at home, courtesy my dear friend Christina.

It was my friend Sanga's last day in Pune. And so Christina made him a farewell Biryani dinner before he left for the airport.


Why Biryani? Because, apparently, that is a romantic thing to do these days. Like, Sanga once said, "Beauty lies in the eyes of the Biryani holder", and Christina replied, "I'm just a girl, standing in front of a boy, asking him to love Biryani."

Anyhoo, I left work early that day and went straight to Christina's house. Sun was about to set in the distant Pune horizon.


By the time I reached her place, Christina had already prepared the Chicken base, so I don't have any photos of the preparation, but here is an easy step by step method on how to make the Chicken base, as described by Christina to me.

1. Take the raw chicken and wash it.

2. Cut it into small pieces (if not cut already).

3. Optionally, you can remove the bones.

4. Add salt, turmeric powder and Kashmiri powder to the raw Chicken (Christina used Kashmiri powder instead of Meat masala because the latter gives it a very rich Indian masala taste and smell that she doesn't like).

5. Grind ginger and garlic to paste.

6. Add Long (Cloves), Elaichi (Cardamom) and Thakthing (Cinnamon) to the paste.

7. Apply the paste mixture to the Chicken.

8. Finally add Dahi (Curd) to the entire Chicken. Let it marinate for 2 hours.

9. Heat oil in a frying pan and add finely chopped onions once heated.

10. Add the marinated Chicken. Let it cook like that while occasionally stirring it.

Once cooked, the Chicken base for the Biryani is ready!


Meanwhile, cook the rice separately.

Christina added Milk with the water to cook the rice, along with 5 tbsp butter and 1 tbsp salt to give it a really good aroma and buttery taste. And finally before closing the lid, she placed one Cardamom on top and then cooked the rice (in Mizo we call this "Chaw elaichi chhipchhuan" :P )


Once the Chicken base and Rice were ready, it was finally time to make the Chicken Biryani. Now here is something new that I learnt from Christina that night.

If you are going to use a normal cooking pot that is thin layered, ALWAYS apply salt at the bottom and then cover the entire vessel with foil.


Why? Because apparently Biryani must be cooked at low flame for a very long time, so if this is not done, the entire bottom of the pot gets black and deep fried!

Once the cooking vessel is properly covered with foil, add the prepared Chicken base at the bottom.


Fill it to around half the vessel, and then add the cooked rice on top of it.


Thadaaa, your Chicken Biryani is ready to be cooked. Also cover the lid properly with foil again.


Similarly, take the remaining Chicken base, and if you have a cooking pan with thick exteriors, then there is no need to put salt at the bottom and cover with foil, you can add the remaining rice directly on top and cook it just like that.


And so that is how you make a delicious home-cooked Chicken Biryani.

Once we were done enjoying the delicious cuisine, Christina packed some Biryani as tiffin for Sanga to eat on his long flight back to Kolkata.


And then yeah, we all saw him off as his Uber came to pick him up.


Farewell my brother.

So that was it. A really good and easy to make Chicken Biryani. Are you planning to make it this way? Do let me know in the comments on Facebook.

Until then, cheers for now everyone. More food posts coming up soon.


Tuesday, June 18, 2019

Chp 761. Dinner by Zodini


For the next couple of blog updates, I will be posting about the recent dinners I had at various homes here in Pune, with as much detail as possible on the food served and the recipes. A series of food blog post for all you food lovers out there. :)

One of the perks of being a single bachelor who live alone is that all your friends across town feel sorry for you, and so you get invited to dinners regularly. Sometimes the awesome food they cook can fill up the emptiness in your heart to a certain extent… *cue dramatic response* :P

First up, is of course my dear friend Zodini, well renowned across our Pune Mizo community for her delicious cooking. Wife of my bro Daniel, you have to be completely sober when you are invited to her place for dinner otherwise you may miss out on the delicious food she had made with so much passion and intensity.

That night, Zodini had also invited a few other people to equalize the male-female ratio :P


A really merry bunch of people - Mazuii, Duati and Zoey. They filled that night with a lot of fond memories.

Below are the awesome dishes Zodini had made that night. She messaged me earlier about the description of each recipe, which I am reproducing here to the best of my abilities.


Arsa kan (Chicken Fry Mizo style)


After deep frying the raw chicken for a few minutes on high flame, take it out and then add onions, garlic, tomatoes, green peas, and other garnishes. And then slowly add the deep fried chicken back to the mix again and put the flame in simmer, until they smell like Heaven :)


Bawngsa leh Alu kan (Beef and Potato gravy)


Heat some oil in a pressure cooker and quickly add onions, garlic, a few pieces of ginger, one pinch of meat masala, turmeric powder, chilli powder and salt, along with leaves of Bahkhawr (Culantro). Add the meat and stir for some time until everything is mixed properly.

Add some water to the mixture and then close the pressure cooker and put the flame on high. Wait for the cooker to whistle at least 6-7 times, and then reduce the flame to simmer. After a few more minutes, switch the stove off, depressurize the cooker and open it. Add chopped potatoes in it, add some more water and then cook at high flame again. Wait for it to whistle 3 times, and then cook at simmer until it is ready.


Methi bai (Fenugreek Mizo stew)


Take salt, soda powder and ajinomoto and mix it in cold water. Once mixed properly, heat it to boil. As the water boils, add chopped brinjal (the small variant) and green chillies. Cook for some time and then add Methi and stir for a while until the dish is ready.


Tauh (Mizo mixture)


Take the sprouts of Moong dal (green gram) along with 3 different types of chana (chickpeas). Soak them in water until they hydrate and enlarge ("that's what she said!"). Mix them in a bowl with chopped onions, roasted chillies and salt. Squeeze some lime on the mixture. Heat a small quantity of oil and add that boiling oil to the mixture, hear that beautiful sizzling sound, and again mix it real well.


Hmarcha rawt (Mizo Chilli chutney)


This is perhaps the easiest to make but without it, no Mizo meal course is complete. Hmarchapui (large green chillies) are roasted directly on the flaming stove (yes, great care must be taken to ensure that there is proper ventilation in the house or else everybody's gonna cough and wheeze). Once they are roasted nicely, put it in a grinder with onions, tomatoes, and a pinch of salt and ajinomoto. Grind the mixture until they are all in small pieces. Thadaaa, Mizo hmarcha rawt.


Iromba (Fermented Fish Potato chutney)


This is a popular Meitei dish and not a Mizo one, popular across Manipur, Mizoram and Nagaland. You can read about how to make a simple Eromba on my previous post Chp 738. How To Make Eromba. The way Zodini made it that night was a bit different though, she had put fermented fish, boiled potatoes, brinjal, tomatoes, bastenga, salt and ajinomoto in a vessel with water, and after boiling them for some time on simmer, she grinded them all together and then garnished it with onions with dhania (Cilantro). Super yumm!

And that was it, the awesome dinner Zodini made for us. My plate -


Here are a few bonus pics of that night. Great food, great time, great memories :)


Soon it was time to leave. Duati and Mazuii left, and I followed suit as my Uber arrived.


Overall, awesome dinner Zodin, thanks a lot for it. Looking forward to it again soon :D

I hope this post was useful to you all, do hit me back if you want more details about the recipes, tomorrow's post is going to be about Biryani. Signing off for now, cheers everyone. G'nite.


Wednesday, June 05, 2019

Chp 760. Haleem in Pune


Eid Mubarak everyone!


So this past one month, while my Muslim friends were all fasting, I was having the time of my life enjoying Haleem! :D

Haleem is a special Muslim delicacy we get here in India only during the month of Ramadan/Ramzan. It is a stew/broth like cuisine made from wheat and meat. I always thought Haleem was made from mutton, until my landlord who's from the Gulf told me the Haleem they used to eat back in the Middle East was made from camel's meat! I would love to try that out one day.

Back when I was in Hyderabad, I used to have Haleem almost every night during Ramadan. And then I moved to Mumbai and "Kakori House" was the only restaurant I found that delivered tasty Haleem. Now that I am in Pune, I looked at Swiggy and found six restaurants delivering Haleem to my location. I decided to try them all out! :D

Here's my journal.


1. Biryani By KG, Viman Nagar.
Mutton Haleem + 2 Roti + Chicken 65 combo at ₹ 359


Yeah, "Biryani By KG" is the name of the restaurant, don't give me that look, I didn't come up with it :D Their Haleem was super yummy! I was a bit surprised though, as I was expecting Mutton Haleem and Chicken 65 to be served separately, but instead, it came together as one dish :D This was a special Swiggy Ramzan combo and it is not there on their menu now. I had it with some beef king chilli pickles and I thoroughly enjoyed it.


2. Cafe Diamond Queen, Camp.
Mutton Haleem x 2 - ₹ 360


This Haleem came with extra loads of deep-fried onions, making it super delicious. I ordered two for lunch since I was going to Teresa's place later that night and I wanted Nitin to have a taste of it. My only complain about this Haleem was that there were no cashew nuts in it. Cashews really make the Haleem tastes extra better, IMHO


3. New Paradise, Kharadi.
Mutton Regular Haleem at ₹ 200


See, this is what I meant by having cashews in Haleem. It really makes it tastier and the aroma can make any mouth water. I had it with fried eggs and raw onions. It might look simple but it was sooo gooood!


4. Faasos, Viman Nagar.
Mutton Haleem With Laccha Paratha and Kulcha - ₹ 319


Yes, even Faasos made Haleem during Ramzan :D Don't let the quantity above fool you, it might look less but it was extremely filling. Heavy and thick, this version from Faasos used almonds instead of cashew nuts and it gave it a very distinctive flavor.


5. George Restaurant, East Street.
Mutton Haleem at ₹ 200


This Haleem came with large chunks of meat, which was surprising since Haleem is supposed to be minced and broth-like. It was tasty anyway, and I had it with omelette.


6. Behrouz Biryani, Viman Nagar.
Gosht Haleem with mini Falafel-E-Khaasand mini Murgh Koobideh at ₹ 351


And finally, I ordered from Behrouz Biryani. I knew their Haleem was going to come with lots of dry fruits since Behrouz was known for adding such stuff on their biryanis. Also, you won't find this item on their menu again until the next Ramzan, so it was a must have.

Overall, that was my experience with Haleem this year, and I look forward to it again next year. My colleagues and I actually planned to go to this restaurant called "Arabian Bites" at Kondhwa last week to try out their Haleem as it is apparently the best Haleem in Pune, but unfortunately, my dear friend Siami met with an accident (she's ok now) and I had to take a leave the next day, and so we all cancelled the plan. But next year, if we are all alive and well, that's where we will be heading.

So, this is my short review on the Haleem that we get around Koregaon Park and Kalyani Nagar in Pune this year, hope you found it useful. Eid Mubarak once again everyone, see you all later. Cheers.