Continuing with my Foodie blog updates, here is a simple home-made Chicken Biryani that you can also cook at home, courtesy my dear friend Christina.
It was my friend Sanga's last day in Pune. And so Christina made him a farewell Biryani dinner before he left for the airport.

Why Biryani? Because, apparently, that is a romantic thing to do these days. Like, Sanga once said, "Beauty lies in the eyes of the Biryani holder", and Christina replied, "I'm just a girl, standing in front of a boy, asking him to love Biryani."
Anyhoo, I left work early that day and went straight to Christina's house. Sun was about to set in the distant Pune horizon.

By the time I reached her place, Christina had already prepared the Chicken base, so I don't have any photos of the preparation, but here is an easy step by step method on how to make the Chicken base, as described by Christina to me.
1. Take the raw chicken and wash it.
2. Cut it into small pieces (if not cut already).
3. Optionally, you can remove the bones.
4. Add salt, turmeric powder and Kashmiri powder to the raw Chicken (Christina used Kashmiri powder instead of Meat masala because the latter gives it a very rich Indian masala taste and smell that she doesn't like).
5. Grind ginger and garlic to paste.
6. Add Long (Cloves), Elaichi (Cardamom) and Thakthing (Cinnamon) to the paste.
7. Apply the paste mixture to the Chicken.
8. Finally add Dahi (Curd) to the entire Chicken. Let it marinate for 2 hours.
9. Heat oil in a frying pan and add finely chopped onions once heated.
10. Add the marinated Chicken. Let it cook like that while occasionally stirring it.
Once cooked, the Chicken base for the Biryani is ready!

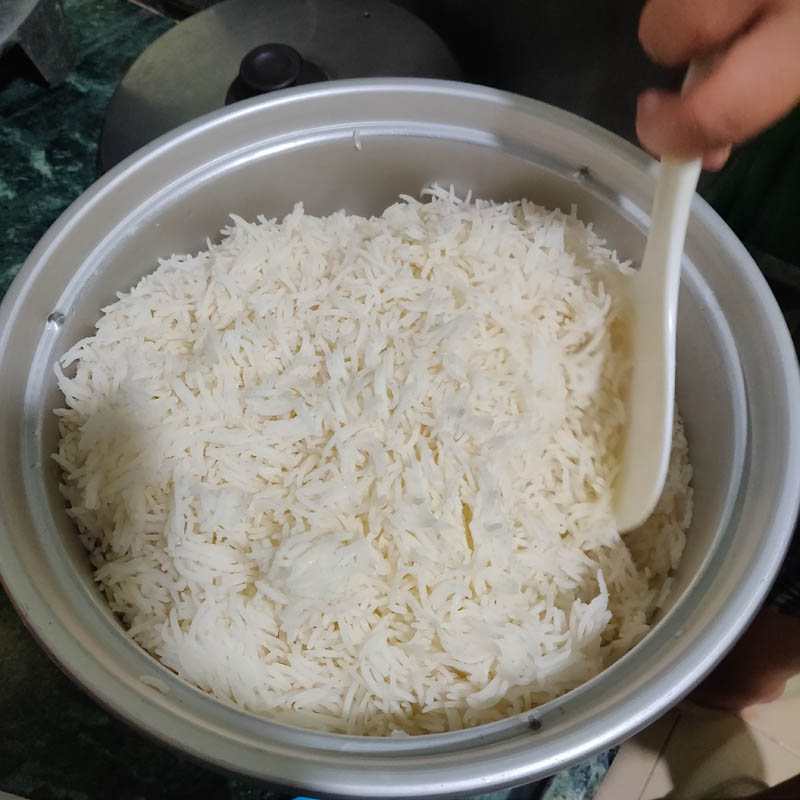
Meanwhile, cook the rice separately.
Christina added Milk with the water to cook the rice, along with 5 tbsp butter and 1 tbsp salt to give it a really good aroma and buttery taste. And finally before closing the lid, she placed one Cardamom on top and then cooked the rice (in Mizo we call this "Chaw elaichi chhipchhuan" :P )
Once the Chicken base and Rice were ready, it was finally time to make the Chicken Biryani. Now here is something new that I learnt from Christina that night.
If you are going to use a normal cooking pot that is thin layered, ALWAYS apply salt at the bottom and then cover the entire vessel with foil.
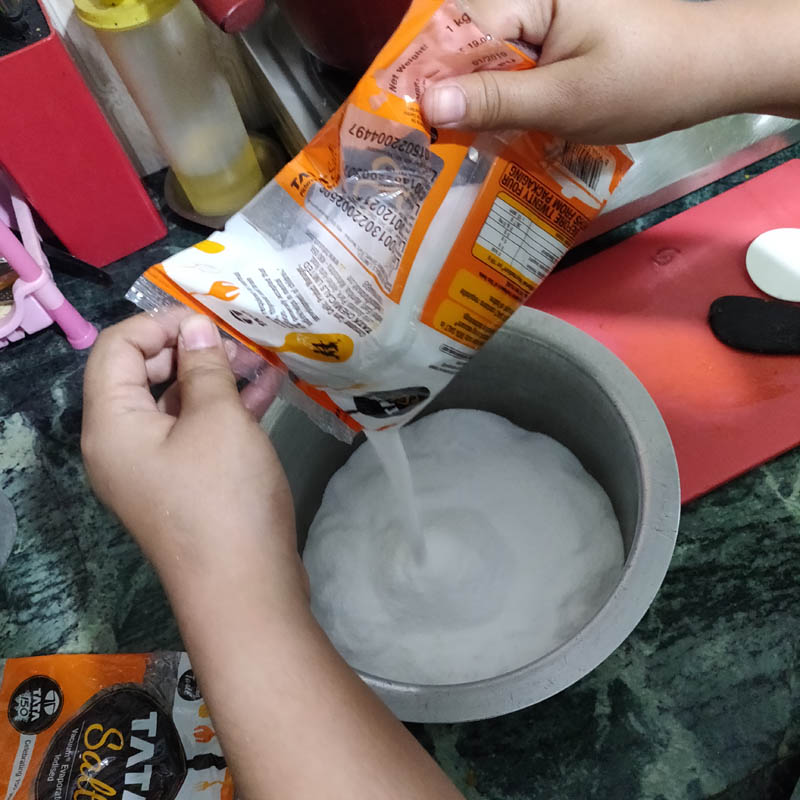

Why? Because apparently Biryani must be cooked at low flame for a very long time, so if this is not done, the entire bottom of the pot gets black and deep fried!
Once the cooking vessel is properly covered with foil, add the prepared Chicken base at the bottom.


Fill it to around half the vessel, and then add the cooked rice on top of it.
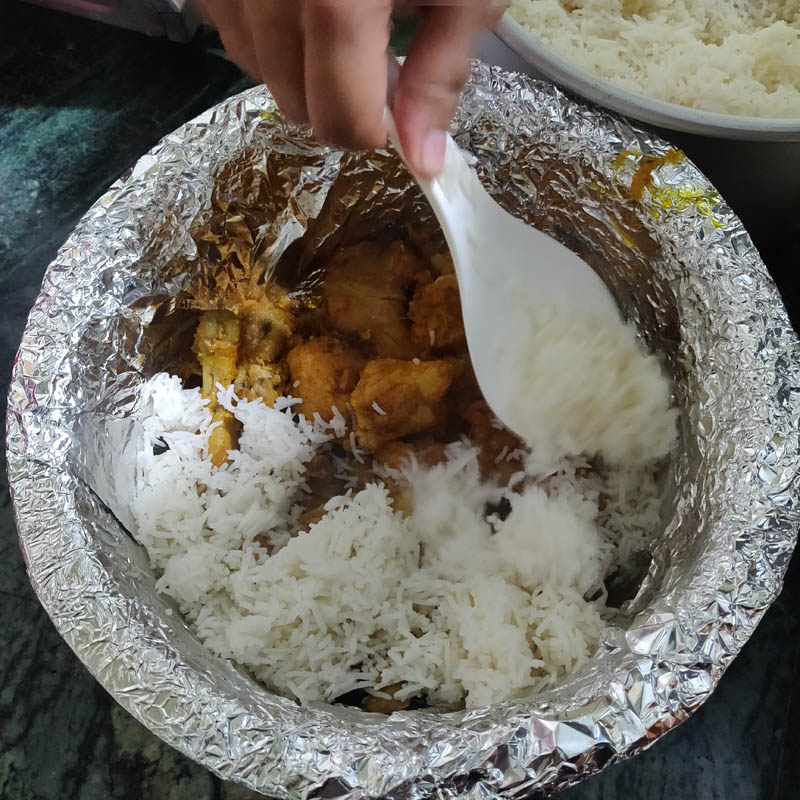
Thadaaa, your Chicken Biryani is ready to be cooked. Also cover the lid properly with foil again.

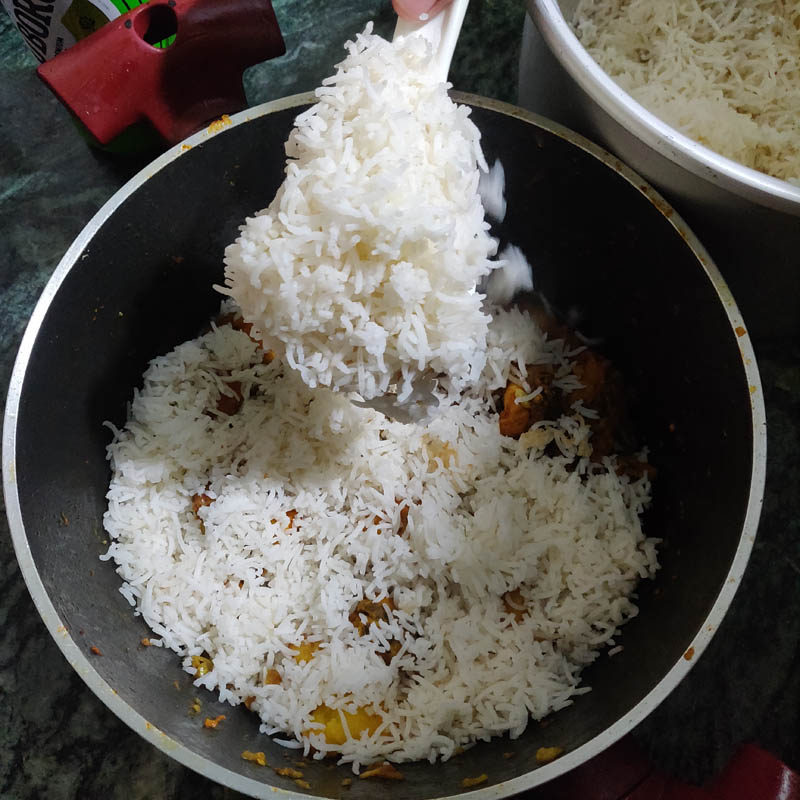
Similarly, take the remaining Chicken base, and if you have a cooking pan with thick exteriors, then there is no need to put salt at the bottom and cover with foil, you can add the remaining rice directly on top and cook it just like that.

And so that is how you make a delicious home-cooked Chicken Biryani.
Once we were done enjoying the delicious cuisine, Christina packed some Biryani as tiffin for Sanga to eat on his long flight back to Kolkata.

And then yeah, we all saw him off as his Uber came to pick him up.

Farewell my brother.
So that was it. A really good and easy to make Chicken Biryani. Are you planning to make it this way? Do let me know in the comments on Facebook.
Until then, cheers for now everyone. More food posts coming up soon.
No comments:
Post a Comment